Timing a Camshaft
Camshaft timing on production engines can be out by quite a significant amount so when fitting a new camshaft or rebuilding an engine to get the most out of your camshaft you will have to set it up accurately.
The following information is based that I found on the internet back in 2001 (can’t remember where so I can’t credit the author) when I was rebuilding my Ford Crossflow engine. I have since used this method when rebuilding my Mini engine fitted with a rally cam.
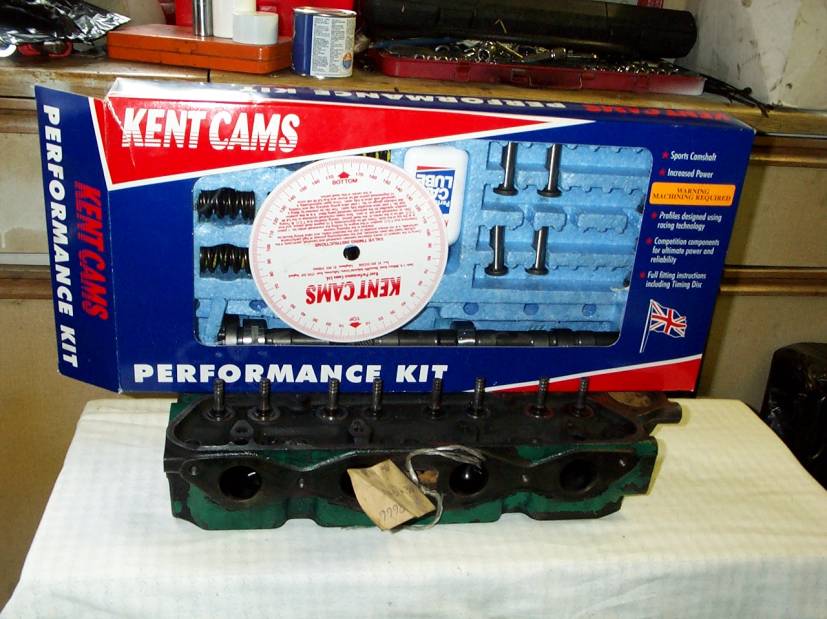
I used a Kent 244 camshaft kit which included matched springs, new followers and cam assembly lube. The 244 cam needs pockets in the pistons as otherwise, due to the high lift, valve to piston contact would take place.
To set up the camshaft you need these tools, a degree wheel and a dial indicator with a magnetic stand. Luckily the Kent camshaft kit comes with a protractor wheel I did my rebuild a few years back but I noticed at the recent Harrogate show that nowadays you can buy a dial indicator and stand very cheaply.
Fit the degree wheel on the front of the crank, or on the flywheel, whichever is easiest. You also need a pointer, like a piece of welding wire, bolted to the block.
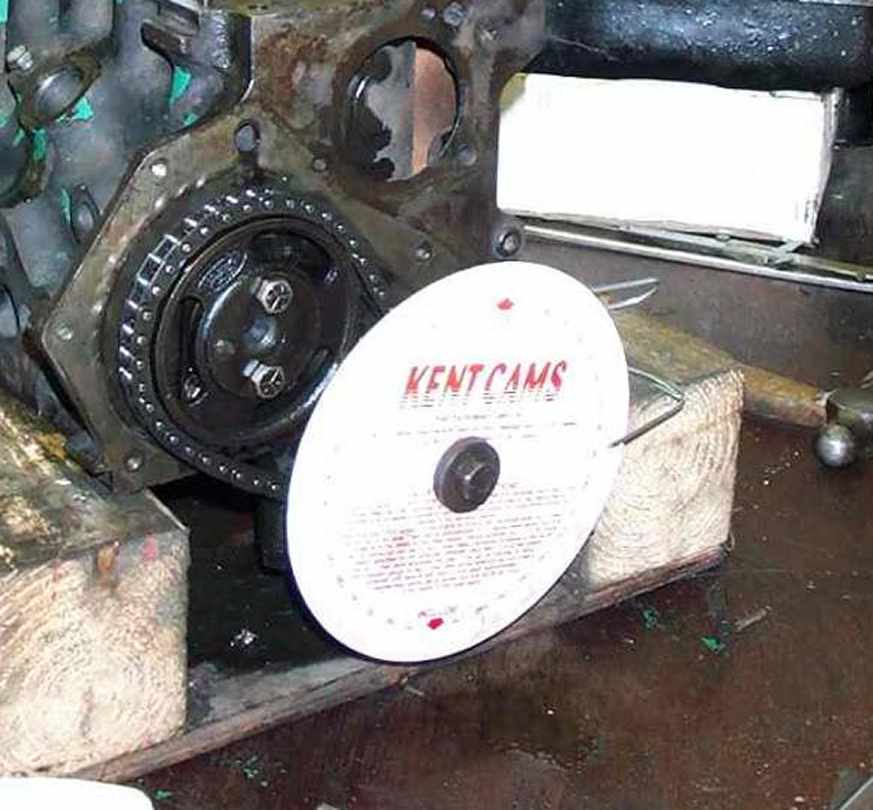
Rotate the crank clockwise until the number one piston is at top dead centre (tdc). Then align the pointer to tdc on the degree wheel.
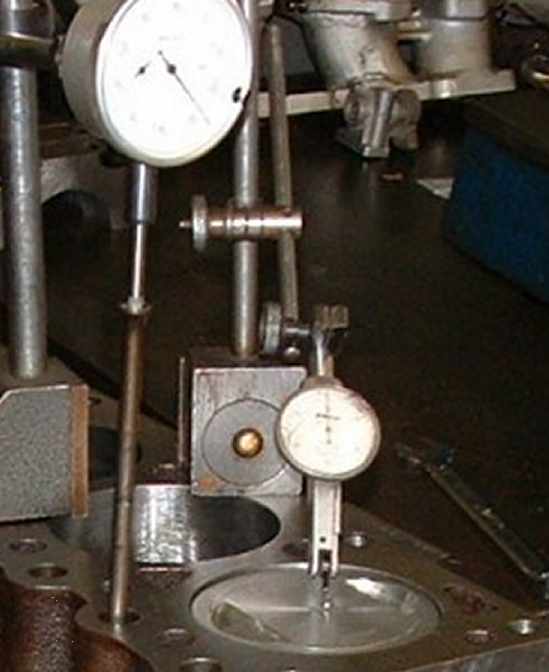
The next step is to find exact tdc Place your indicator on the block face and the dial register on the dead centre of the piston, rotate the crank to find the true tdc. Reset the pointer to zero on the degree wheel.
Now assuming you have the cam already installed, with timing sprockets lined up to manufacturers marks found on the cam and crank sprockets, at this stage you are working on a block assembly, no head fitted.
Position a push-rod in no.1 inlet lifter with dial indicator position directly on top of the push-rod, the push-rod must be kept in a vertical straight position, rotate the crank clockwise until maximum lift is reached. At this stage you must make sure your indicator has got enough travel to reach full lift continue clockwise until you reach the heel of the cam, adjust the dial, so it has got about 020 depressed into its operating range of the indicator. Set the dial to zero and rotate the engine several times to check that everything is secure and the indicator dial returns to zero each time.
Always rotate the engine in the same direction. This ensures that any slack in the chain is always taken up in a constant fashion.
To check out the camshaft timing rotate the engine clockwise until the clock gauge reads 016thou. Take a reading from the degree wheel and note it down, continue rotating the engine until you reach full lift, make a note of how much lift you have got. Write it down rotate to zero again and proceed to rotate clockwise again until you reach 016thou.
Check that you have the same reading on the degree wheel, if not, something is not stable - put it right. If the reading is OK continue on until you reach within 010 thou of your initial reading at full lift. Make a note of the reading on your degree wheel, now continue clockwise past full lift and back to where you last took the reading on your dial gauge that being just before full lift, check the degree wheel and note down the reading, then add the two readings together and divide by 2 you should have the same reading as you have on your spec sheet which came with your cam.
If your cam spec sheet reads 106 degrees at full lift and your reading is 108 you are 2 degrees retarded. If your reading is 104 you are 2 degrees advanced. The teeth on the camshaft sprockets are too course to make small adjustments so you will need either a fully adjustable vernier gear or 2 degree offset woodruff key/ camshaft dowel (depending on your type of engine) on your cam sprocket to make the necessary timing adjustment ..
Technical Tips
- JC Locust Build Manual
- Locust Chassis
- Locust Pedal Box
- Locust Wiring
- Locust Suspension
- Modifying a Lucas Distributor
- Cam Timing
- Mini Boot Liner Plans
- Mini Center Console Plans
- Mini Dashboard Plans
- Mini Fitting A Headlining
- MOT Check Sheet
- Spanner Sizes
- Toe Plates
My Cars
Site
- Locust build
- Locust inspiration
- Locust Update
- Mini Mayfair Restoration
- Mini City E Rebuild
- Fun
- Technical tips
- Photographs
- Fun
- Contact
External Links