Restoration Part 11
Sills
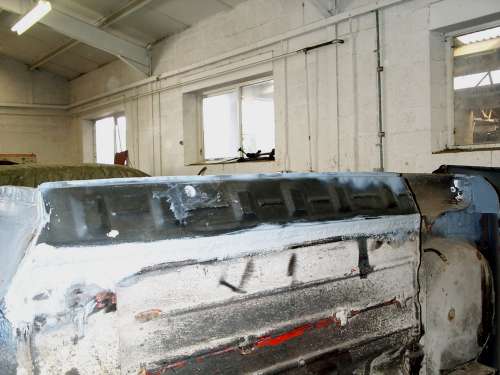
I continued welding in the inner sills the front section was next. It was dealt with in the same way as the rear section e.g. it was cut down at the top edge and the lip was joddled and then welded in place. I made a closing section for the box member that runs across the car from sheet steel and tacked and welded it in place.
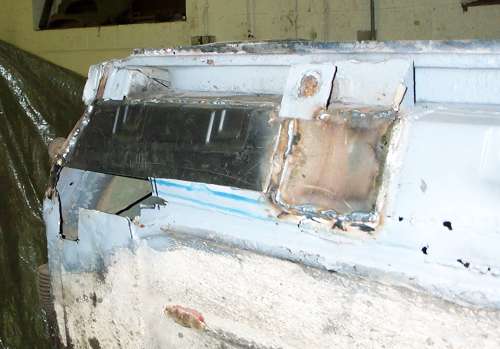
I sprayed the various sections with primer to keep the rust at bay wile the car was being worked on.
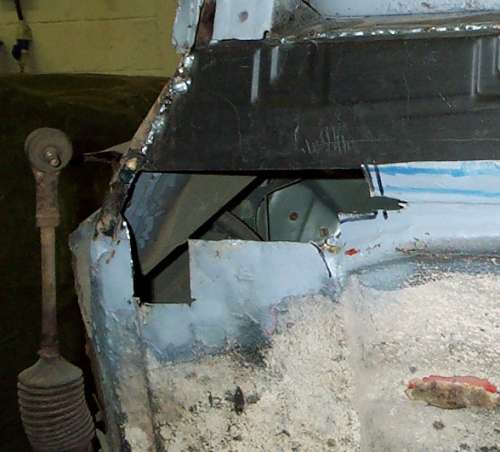
The next step was to fabricate a repair piece for the footwell. This would be made from sheet steel. The problem was that the section wasn't flat it was recessed like a tea tray. Kevin helped me form the recess to match the remaining piece of the footwell. He used a hammer and dolly. Kevin said we would need some long reach clamps and as the college didn't have any suitable ones he kindly volunteered to bring some of his personal ones in for me to borrow.
The repair section was clamped into place using Kevin's clamps they worked brilliantly (why doesn't the college have any?) The section was then welded in place.
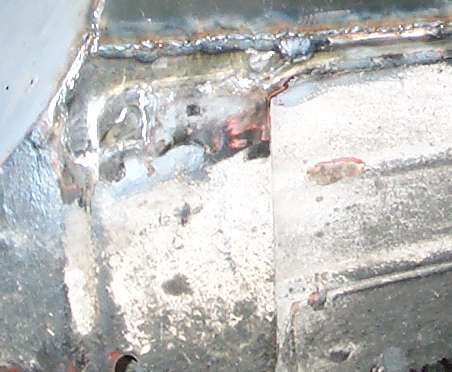
With this complete it was time to fit the outer sill. The sill lip on the car was given a final clean wit the angle grinder when I noticed that there were some areas that were parting company with the door step. These had to be welded together. As the college welder was way too powerful for this delicate procedure I loaned Ed's personal welder (SIP 130) to perform the task.
The sill was then clamped into place using Kevin's magic clamps and then welded the upper join on the body lip was spot welded and the join to the floor pan was tacked and then seam welded.
The joins were then coated with seam sealer ready for priming.
My Mini Mayfair
Restoration
- 1 - Initial Inspection
- 2 - Boot Floor 1
- 3 - Boot Floor 2
- 4 - Boot Floor 3
- 5 - Rear Valance
- 6 - Body Stands & Engine Removal
- 7 - Front End Removal
- 8 - Bulkhead 1
- 9 - Bulkhead 2
- 10 - Sills 1
- 11 - Sills 2
- 12 - Sils 3
- 13 - Sills 4
- 14 - Footwell
- 15 - Floor
- 16 - Battery Box
- 17 - Underside
- 18 - Underside protection
- 19 - A Panels
- 20 - Wings & Front Panel
- 21 - Front Panels & Arches
- 22 - Rear Subframe
- 23 - Return From Paint
- 24 - Brakes
- 25 - Wiring
- 26 - Engine 1
- 27 - Engine 2
- 28 - Fitting Engine
- 29 - Interior, Glass, Lights
- 30 - Wheels & Tyres
- 31 - Finishing Touches