Restoration Part 20
Wings and Front Panel
The drivers side door was reskinned in the same way as the passenger side. The door was then fitted to the car.
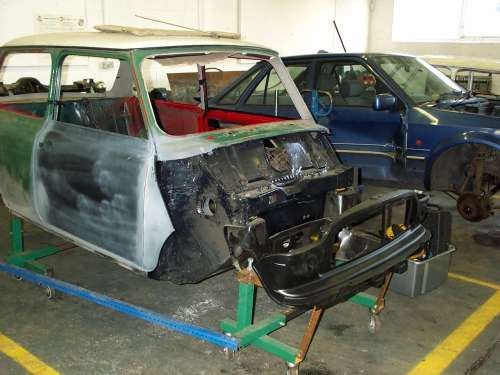
The next step was to plan the rebuild of the front end. The front was being rebuilt as a flip front. This entails fitting the front valance and wings together but not attaching them to the body. The complete front end will hinge from the bottom of the subframe and attach to the body with fasteners on the A panels. The plan is to use Dzutz fasteners on the wing to A panel join and locating pins on the top wing to scuttle top join. The whole front end will be removable. All the electrics to the lights will join with a caravan/trailer socket and plug. The bonnet will use the original hinges but may be fitted with a quick release mechanism to allow the bonnet to be removed easily. To ensure the structural strength is maintained the rubber bottom front subframe mounts were replaced with solid metal mounts and the top bushes were replaced with polyflex items. Brace bars were made to connect the front of the subframe to the bulkhead.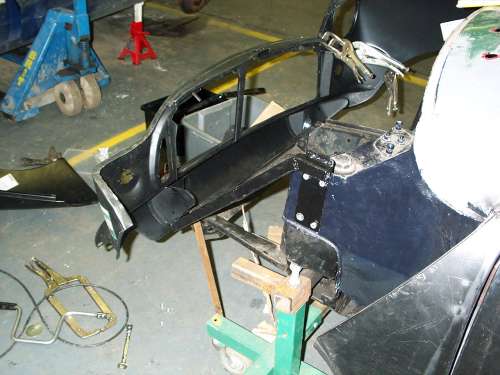
The bars were attached using the shock absorber bracket mountings locations. The shock absorber brackets will be fitted on top of the brace bar mounting plates using slightly longer bolts to locate in the original mounting holes.
The first step was to trail fit the panels. The front valance was bolted to the subframe using large washers and spaces to correctly locate the panel. The wings were then clamped into position. The wings didn't fit over the scuttle lip quite correctly and small pieces had to be removed from the wing to inner wing joining flange. The process of trial fitting the wings was long and tedious as they had to be removed and refitted a lot of times until I has happy with the fit. While this was going on the front valance fit was constantly being adjusted with spacers to compensate for the fit of the wings.
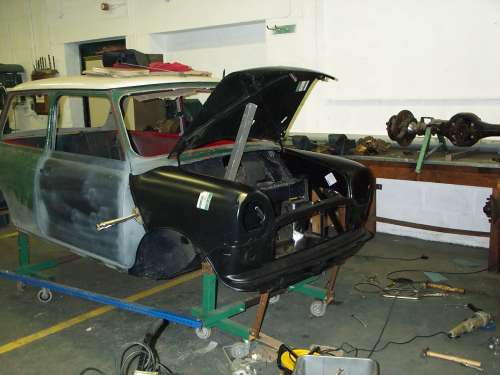
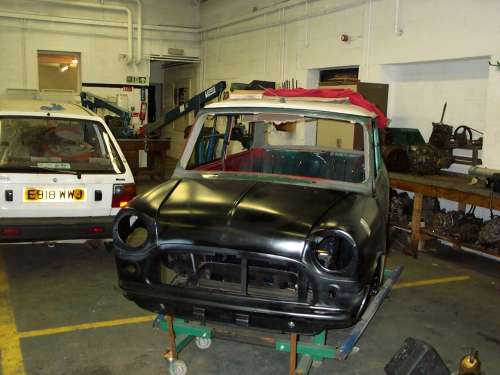
The bonnet was next to be trial fitted. The hinges and bonnet catch were cleaned up and fitted. The bonnet was then attached and the whole alignment process was started again. With a bit of juggling around the fit was finalised.
The wing to valance joins were then spot welded where the welder could reach and seam welded with the MIG elsewhere.
My Mini Mayfair
Restoration
- 1 - Initial Inspection
- 2 - Boot Floor 1
- 3 - Boot Floor 2
- 4 - Boot Floor 3
- 5 - Rear Valance
- 6 - Body Stands & Engine Removal
- 7 - Front End Removal
- 8 - Bulkhead 1
- 9 - Bulkhead 2
- 10 - Sills 1
- 11 - Sills 2
- 12 - Sils 3
- 13 - Sills 4
- 14 - Footwell
- 15 - Floor
- 16 - Battery Box
- 17 - Underside
- 18 - Underside protection
- 19 - A Panels
- 20 - Wings & Front Panel
- 21 - Front Panels & Arches
- 22 - Rear Subframe
- 23 - Return From Paint
- 24 - Brakes
- 25 - Wiring
- 26 - Engine 1
- 27 - Engine 2
- 28 - Fitting Engine
- 29 - Interior, Glass, Lights
- 30 - Wheels & Tyres
- 31 - Finishing Touches